How to Import PST files into Email Archiver
PST Migration is used to import email from the PST files into Intradyn Email Archiver.
There are three methods to access the PST file on the archiver.
- Upload – upload PST file from your network to the archiver
- NFS – access and read email from PST file residing on an NFS folder
- CIFS — access and read email from PST file residing on an CIFS share
This is a step-by-step guide to Upload PST File and insert emails into the archiver.
STEP 1
- Click on Maintenance Tab
- Click on Upload Migration Data from left menu item
STEP 2
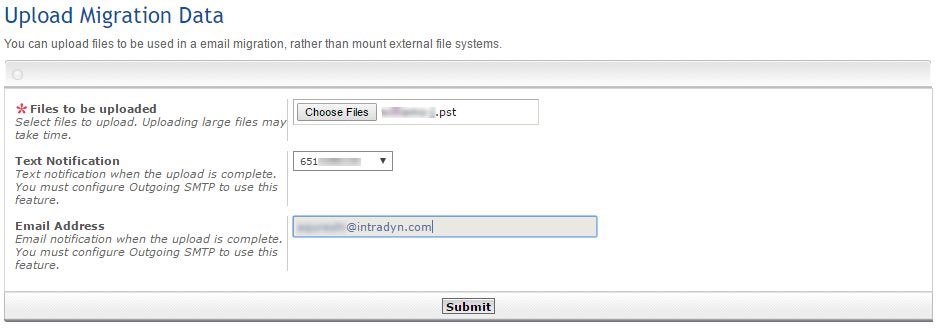
Files to be uploaded – select one or more PST files to be uploaded to the archiver
Test Notification — uploading a PST file will take some time. Archiver can you sent you a text message once the upload is done.
Email Address – if you prefer archiver can send you an email message once the upload is done.
Submit – click submit button, after you have entered the information.
STEP 3
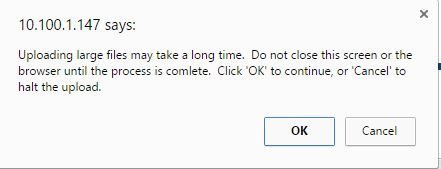
NOTE: Uploading large files may take a long time. Do not close this screen or the browser until the process is complete.
Click OK to proceed.
STEP 4
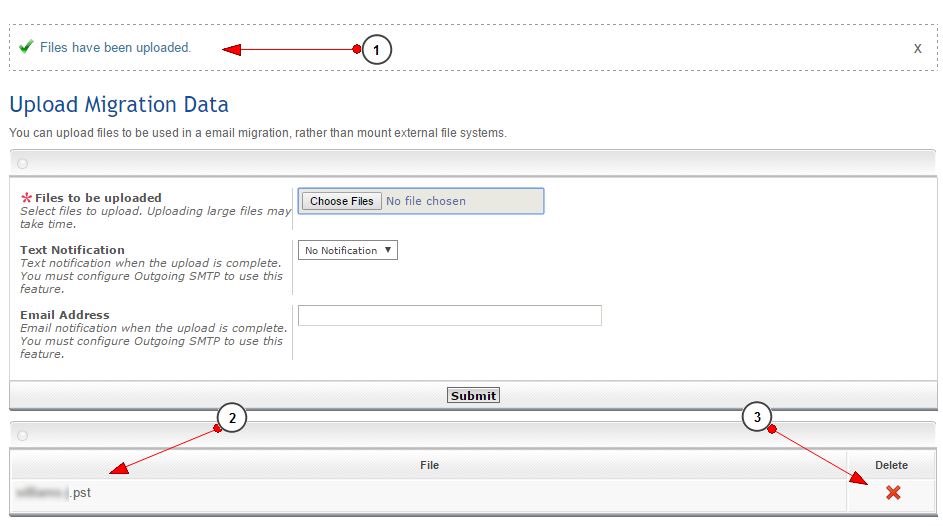
- A message will appear on the browser when the file has been uploaded successfully.
- The name of the file which was uploaded
- You have an option to delete this file.
NOTE: If you have uploaded files earlier they will be visible here.
STEP 5
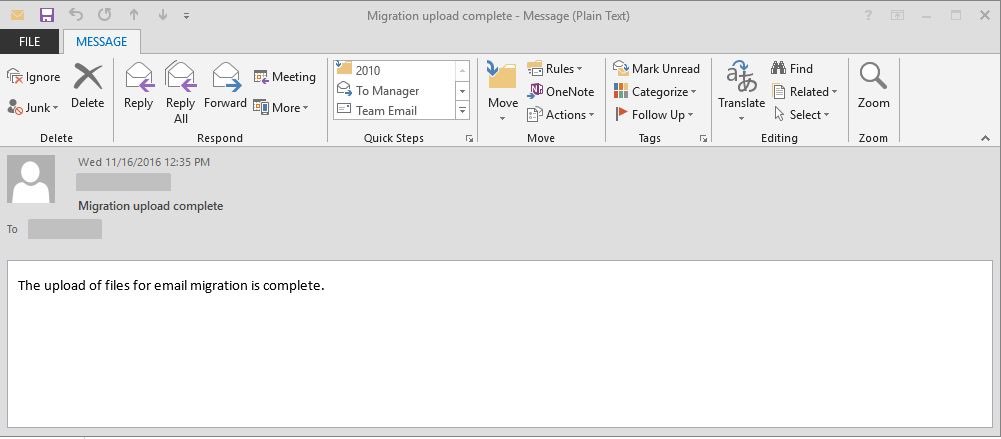
The email notifying that the file upload is completed
STEP 6
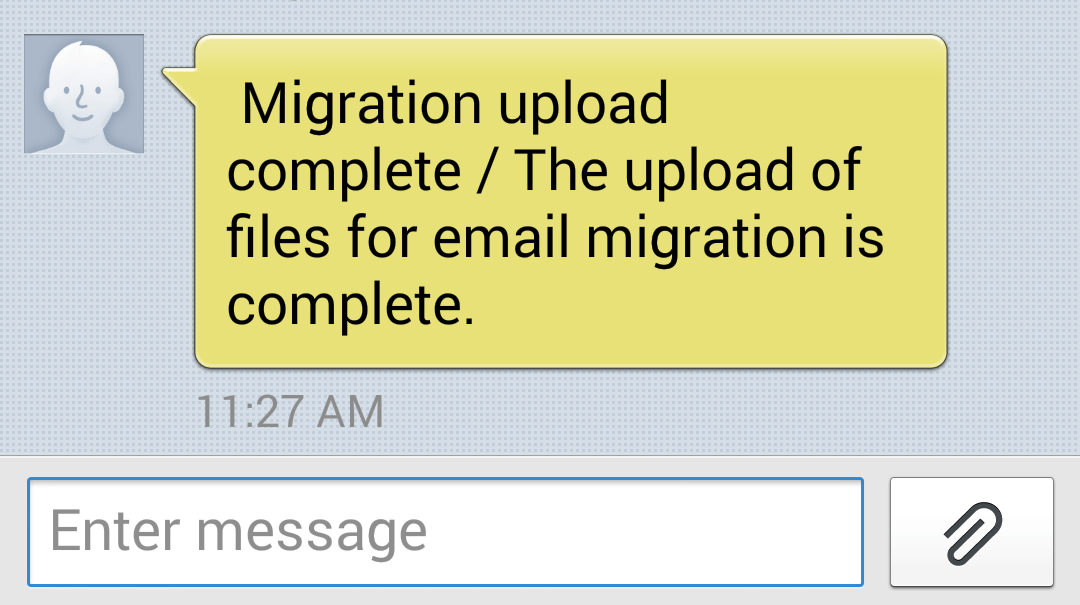
Text message notifying that the file upload is complete.
STEP 7
- Click on Maintenance tab
- Click on PST Migration left menu item
STEP 8
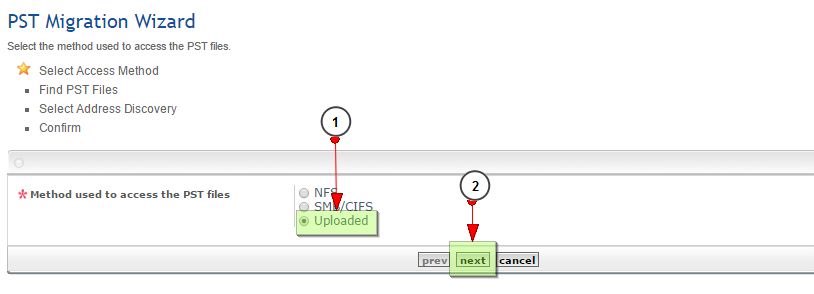
- Click on Uploaded radio button
- Click next button
STEP 9
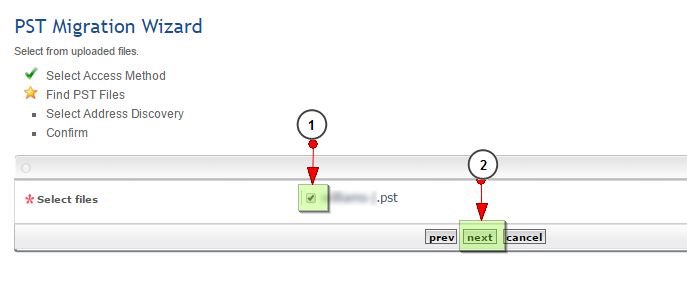
- Check the PST file(s) you want to process
- Click on next button
STEP 10
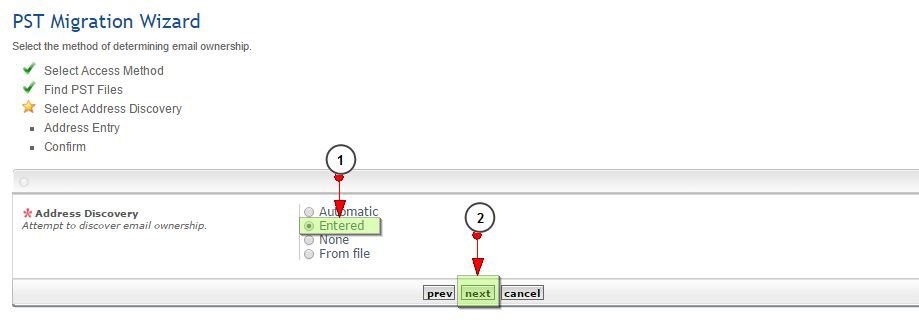
- Select Address Discovery In this guide Entered is selected.
- Click next button
Address Discovery
Here we make sure the emails are associated with the correct user. See Security implications of PST migrations below for more details. Note, if you selected “File” on the “Find PST Files” screen, you will skip this screen.
- Automatic — The migration tool attempt to find the email address for the owner of each PST file.
- Entered —The tool will present you with a lists of PST files it has found and allow you to provide the owner’s addresses.
- None —No attempt to match an email to a user will be made.
If you select Automatic, the tool will attempt to assign email addresses. This process is not perfect, so we need to have our conclusions validated by the administrator. To do this, the process halts after email is extracted from the PST file and before it is inserted into the vault. At this time, the administrator must visit the migration screen, validate (or change) the user addresses, and resume the migration.
To aid in this process, you will be able to add an email address or phone number at this point. If you do, email and text messages will be sent when validation is needed.
Security implications of PST migrations
Some PST files do not contain email addresses in the emails. They contain names, which are expected to be mapped to email addresses. Unfortunately, we do not have access to that mapping. This affects who can and cannot view emails on Intradyn systems.
To address this issue, we have added Address Detection. Using this, we can manually add missing addresses to the emails, allowing for proper security.
A basic premise of this feature is that a single PST file contains emails that all belong to a single user.
A PST migration is a two-step process, extraction from the PST file, and insertion into the Intradyn. The work flow of the migration depends on several settings.
If the Find PST Files setting is File, which PST files to migrate and what email address to attach is found in a file. In this case, both phases will be done without stopping.
If the Select Address Discovery setting is set to Automatic, the Intradyn will examine the emails and attempt to discover who owns them. In this case, the migration will stop after the first step. You must them go back to the migration tab. There, you will be presented with the names of the PST files and the email address of the owner of those files, along with the level of confidence we have in the correctness of that determination. If the address is not correct, you can correct them now.
After you have examined and corrected the owners, select all the PST files you want to complete and click the Insert button. All selected files will complete processing and be removed from the list.
Any file for which you cannot determine the owner or wish to discard (not insert into the vault) can be selected and discarded using the Discard button.
A new migration of different PST files cannot be started until all current PST files have either been inserted or discarded.
If the Select Address Discovery setting is set to Entered, the Intradyn will take you to a screen that will display all the PST files and allow you to enter addresses. You may then proceed with the migration. It will complete both steps with no further intervention.
If the Select Address Discovery setting is set to None, the Intradyn will not attempt to attach any addresses to the emails. This is the correct setting to use if the PST files contain email belonging to more than one person. If, however, the emails do not contain all the email addresses, they might not be visible to the owner.
STEP 11
- Enter the email address of the user this PST files belongs to.
- Click next button
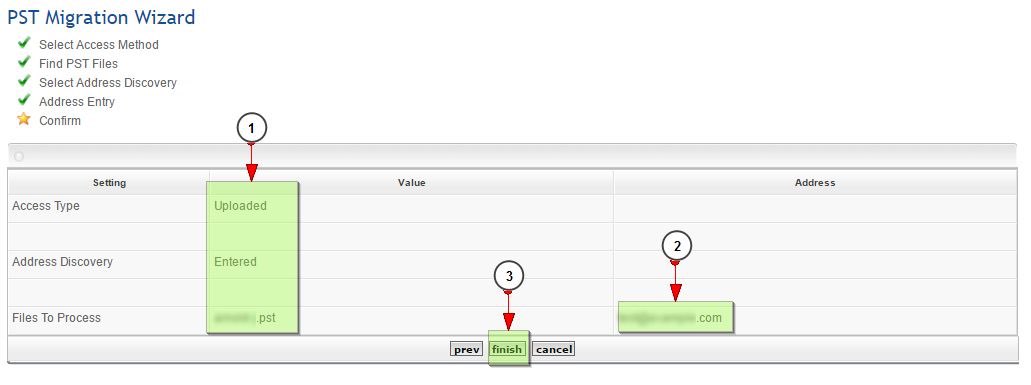
STEP 12
- This is the support of all the options which were selected or entered by you. If any changes are required click prev
- This is the email address of the owner of PST file
- Click Finish
STEP 13
- A message will appear when the PST migration process is started successfully
- The current status of the process will visible here.
- There are two actions you can take.
- View details of the process
- Stop the process
STEP 14
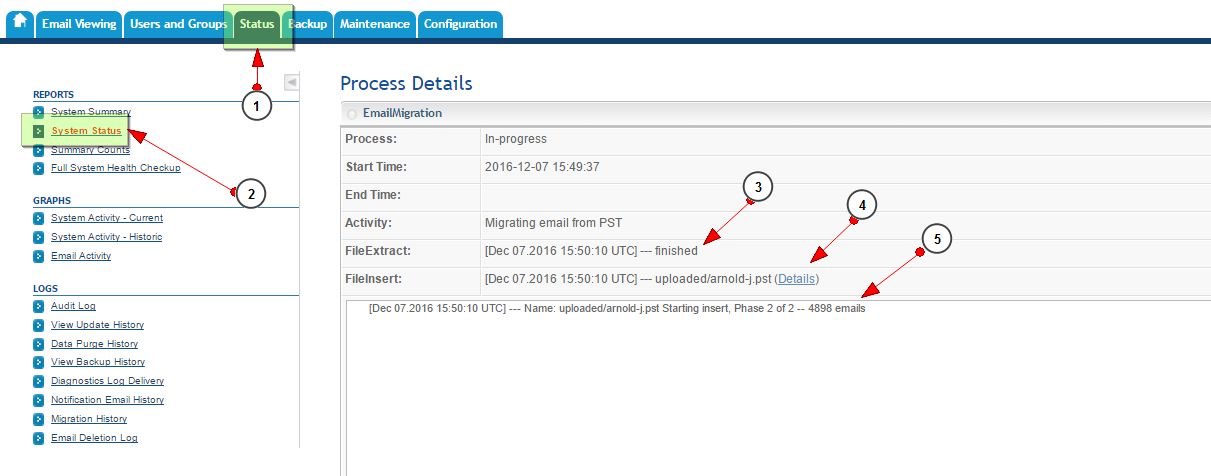
PST migration imports emails in two (2) steps. First it will extract the emails from the PST file. Second it process the emails so they are searchable.
- Click on Status tab
- Click on System Status left menu item
- First step of extracting emails from the PST files has finished.
- Second step is in progress. It is a different background process. Multiple process makes it possible to process one than one file at a time.
- Second part of the process is in progress
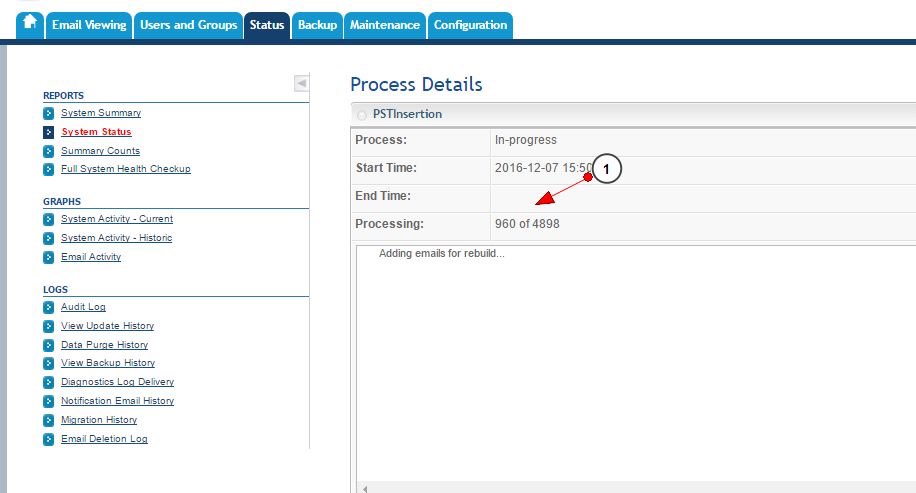
STEP 15
This is details of the second part of PST migration process. It is processing emails so they will be searchable.
- The number of emails process and the total number of emails.
STEP 16
You can view the running PST migration anytime by visiting System Status page. They are visible under Active Jobs as long as the processes are running. Once they are finished their status will be available under Inactive Jobs on the same page.
- Click on Status tab
- Click on System Status left menu item
- EmailMigration is primary process
- PST insertion is the process which is making the emails searchable.
STEP 17
You have successfully inserted the PST file into your archiver.

